

 Spend a lot of time setting up AV components, and you'll soon realize that the default, out-of-the-box settings are not always ideal to get the highest-quality AV performance. This seems counterintuitive - why doesn't the manufacturer configure the gear to perform its best? The truth is, many manufacturers (especially the huge, mass-market ones) just want to sell the gear, and the worst thing that can happen is that the gear comes back because someone thinks it doesn't work properly. Oftentimes, AV devices are set up to be compatible with the widest range of systems, which means they must be configured for the lowest common denominator. Sometimes they're set up to appeal to mass-market shoppers, who place more value on convenience and simplicity than they do accuracy and performance. And sometimes, well, there may be no logical explanation for why they're set up the way they are.
Additional Resources
• Read more original content like this in our Feature News Stories section.
• See more Blu-ray player news and AV receiver news from HomeTheaterReview.com.
• Explore reviews in our Blu-ray Player and AV Receiver Review sections.
With that in mind, we looked across some of major home theater categories - display devices, receivers, Blu-ray players, and cable/satellite boxes - and came up with a quick list of common settings that you might want to change from their defaults to get the highest-quality AV experience.
Display Devices
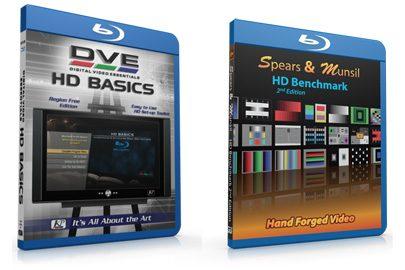
If you read this or any other videophile publication on a regular basis, you already know that the best thing you can do to immediately improve the performance of your HDTV is to switch out of the default picture mode and into a more accurate mode, usually called Movie, Cinema, or THX. The default picture mode in many TVs is usually widely inaccurate in terms of color and white balance, all sorts of artificial and automatic "enhancements" are enabled that may appeal to the everyday viewer but not the enthusiast, and the picture may be unnecessarily dim to meet EnergyStar standards. In the projection realm, the out-of-the-box mode may not be quite so bad, but it's still a good idea to check the different options. Of course, we recommend you go a step further and get an AV setup disc like DVE HD Basics or Spears & Munsil: HD Benchmark 2nd Edition to fine-tune picture controls like brightness, contrast, color, tint, and sharpness - but, at the very least, please change the picture mode.
You'll also want to change the aspect ratio, or picture shape/size. There's this lovely little thing called overscan that's often enabled by default on a TV. Overscan zooms in ever so slightly on the image to cut off the edges of the picture, where you might see unwanted noise, especially with TV programming. If the average shopper plugs in a TV and sees weird noise around the edges of his favorite TV shows, he's going to think something is wrong with the TV; so, manufacturers automatically set the TV in a shape or aspect ratio that cuts off those edges to be safe. The problem is, zooming in and cutting off those edges diminishes resolution. If you're sending a 1920 x 1080 Blu-ray movie to a 1920 x 1080 TV, you want every pixel to be accurately represented. To get this, you need to make sure the TV is set for the right aspect ratio by scrolling through the picture size options until you find one called Pixel for Pixel, Just Scan, Screen Fit, Dot by Dot, or something similar. Some TV manufacturers, like Sony and Panasonic, require the extra step of going into the video setup menu to disable the overscan mode. The same is true for projectors, where there is usually an overscan setting somewhere in the setup menu. The amount of overscan should be set to zero.
AV Receivers
I asked our resident receiver expert, Dennis Burger, to offer up some must-change settings in the receiver realm, and he gave me two right off the bat. First, some receivers enable Dynamic Range Compression (DRC) by default. (What is DRC? Read a good explanation here.) DRC can be helpful when you're watching movies late at night at lower volume and want to be able to hear the softest and loudest elements in the soundtrack. However, if you want to get the most performance out of your receiver on a day-to-day basis, you'll likely want to keep this setting turned off most of the time. I recently reviewed a receiver where Dolby Volume was enabled by default for every source; Dolby Volume and other volume-leveling technologies definitely have their place and purpose, but that doesn't mean you want them enabled all the time with every source.
Secondly, many new receivers come out of the box in an Eco power mode, which does reduce standby power consumption but also has some performance ramifications. First, in the Eco mode, you can't turn on a networkable receiver over the network - in other words, you can't power it up using the control app on your smartphone, using AirPlay, or using an IP control system like Control4. Secondly, the Eco mode in some receivers can impact performance by limiting volume levels. So, you want to look at your receiver's power-consumption settings and check the manual to see how each setting affects performance and functionality.
Blu-ray Players
Did you know that all current Blu-ray players support a picture-in-picture function that allows you to watch a making-of featurette, for example, in a little window on top of the film (if such a feature is included on the disc)? In order to hear the dialogue in that PIP window, a function called Secondary Audio must be enabled...and it is enabled by default on many Blu-ray players. Secondary Audio can also include all the miscellaneous sounds that might be employed on a Blu-ray disc, like beeps when you're navigating the disc's menus. The problem is, when Secondary Audio is enabled, a Blu-ray player does not output Dolby TrueHD and DTS-HD MA soundtracks. The primary and secondary audio get mixed together, so higher-resolution soundtracks must be downmixed to standard Dolby Digital and DTS. If you've noticed that you're not getting high-resolution audio soundtracks from your disc player, even though the disc itself supposedly offers it, then you might want to check this setting in your player's Audio Settings menu.
On the video side, many players are not set up by default to output Blu-ray films at their native 24p frame rate; they are set up to output everything at 60 frames per second, thus requiring the player to add the 3:2 process to get from 24fps to 60fps. That's because many early 1080p HDTVs could not accept a 1080p/24 signal. Most every new 1080p TV now accepts 1080p/24; and, in a world filled with TVs that have a response rate of 120Hz or better and may allow for true 5:5 pulldown, you want to enable 24p playback. To do so, go into the Video Settings menu and look for an option called 1080p/24 output, 24p output, etc.
If you'd like more information on proper Blu-ray player setup
, I go into greater detail on the subject here.
Cable/Satellite Set-Top Boxes
In a perfect world, all of our current source material would be native 1080p (or better), and we would no longer need to convert standard-definition 480i/480p or broadcast 720p/1080i signals for display on our 1080p (or better) TVs. But we live in an imperfect world that requires good scalers/video processors. People often ask me which device should handle video scaling: the TV, Blu-ray player, or receiver. The answer usually is, whichever one does the best job. It depends on the device and the chip within it. But you know which source device almost never does the best job at scaling? Your cable/satellite set-top box. Video processing is seldom the top priority of a set-top box manufacturer, yet most HD cable/satellite boxes are set by default to output only one resolution, either 720p or 1080i (sometimes, 480p may still be the default, which is just plain sad). Depending on the channel you're watching, the resolution may be 480i/p, 720p, 1080i, or even 1080p VOD. When the cable/satellite box is set to output everything at a single resolution, then the box has to do the complicated conversion of all those other resolutions. I can pretty much guarantee that another video device in your system will do a better job of that conversion.
That's why you need to look in your set-top box's Settings menu to see if there is an option to output every channel at its native resolution, which will allow your TV, receiver, or other scaling device to handle the conversion. This setting will likely be located in a menu called Video Settings, TV Format, or the like. Sadly, many cable/satellite set-top boxes still don't allow for native resolution output; but, if your STB allows for it, you may want to use it. Be warned, though: Setting the box for native output usually slows down the channel-changing process, which may not bother you but could bother the non-videophiles in your house who like to channel-surf (which is one reason why the boxes are set that way to begin with).
For more tips on how to properly set up your cable/satellite box, check out our story "Five Tips to Make Sure You're Actually Watching HD on Your HDTV".
That's a quick list of some major setup issues to look for. I'm sure there are plenty more. Do you consistently encounter a default setting that you consider to be a real head-scratcher? Let us know in the Comments section below.
Additional Resources
• Read more original content like this in our Feature News Stories section.
• See more Blu-ray player news and AV receiver news from HomeTheaterReview.com.
• Explore reviews in our Blu-ray Player and AV Receiver Review sections.
Publisher's Note: Loudspeaker and subwoofer placement is a whole other that we will address in the future. Imaging speakers, speaker placement, room acoustics, subwoofer placement, use of multiple subwoofers in a 5.1 or 7.1 theater are all compelling topics that we will expand on in the future articles.
